

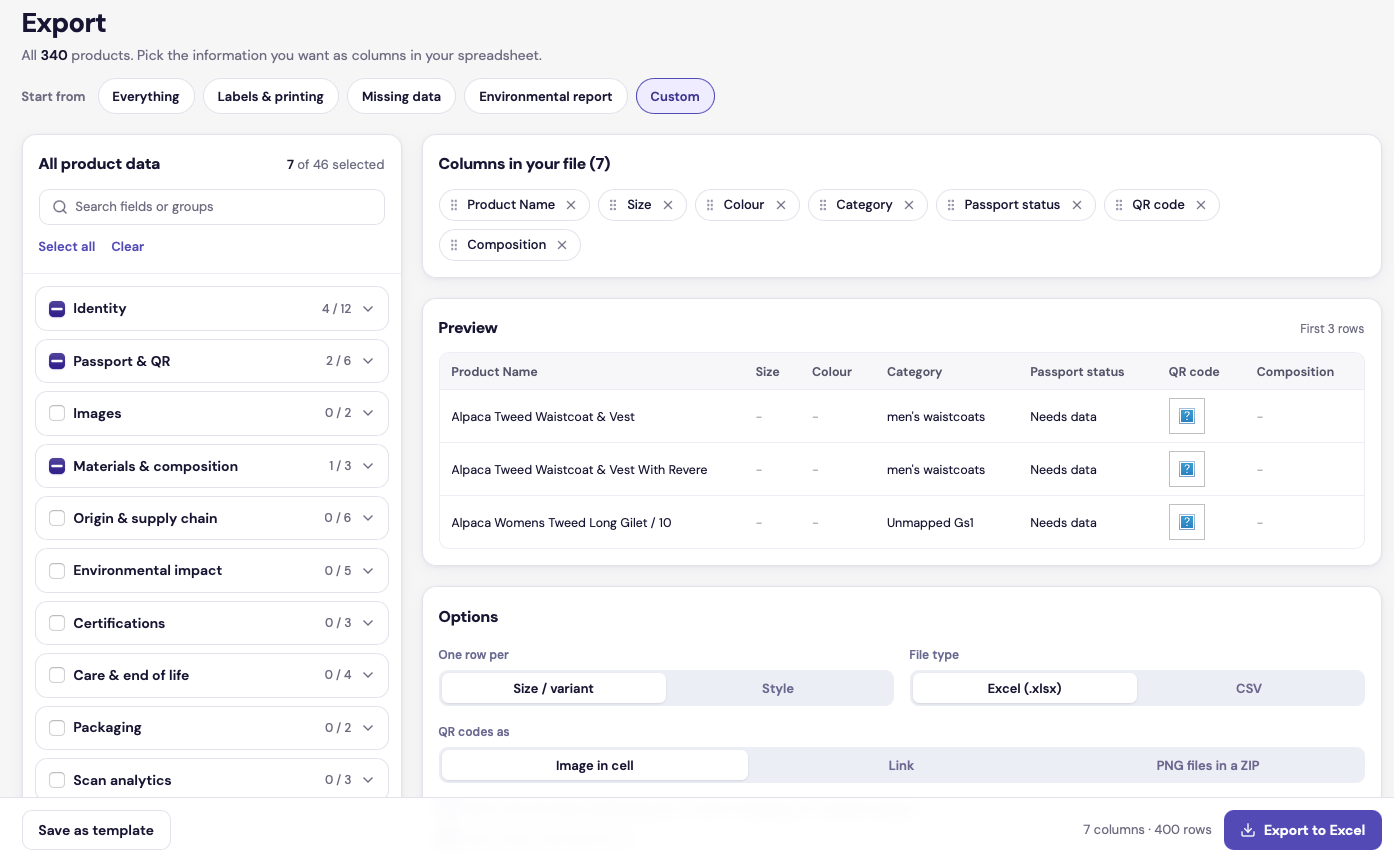
The Export page with seven columns chosen
Exporting needs a role with full access to products. An export includes all your products except those in the trash.
Make an export
1
Pick a starting point
Under Start from, choose a preset:
Or choose Custom and start empty. Templates your team saved appear here too.
2
Choose the columns
Tick fields in the list on the left. They are grouped by topic, such as Identity, Passport & QR, Materials & composition, and Environmental impact. Open a group to see its fields, or tick the group to take all of them. Use the search box to find a field.Your columns appear under Columns in your file. Drag them to change the order, or click the X to remove one.
3
Check the preview
The Preview shows the first three rows with your real data.
4
Set the options
See the options below.
5
Export
The bar at the bottom shows how many columns and rows the file will have. Click Export to Excel or Export CSV. The file downloads when it is ready.For a large catalogue this can take a while. You can leave the page; LUXIMA sends you a notification when the file is ready.
Options
Two tick boxes:
- Add a second sheet explaining each column. Adds a sheet with each column’s meaning, unit and allowed values.
- Mark values estimated by AI. Shows which values are AI estimates, so you know what to check.
QR codes in an export
- Image in cell puts each QR code in the spreadsheet. Excel only.
- Link puts the passport link in the cell. CSV files cannot hold images, so a CSV export always uses links.
- PNG files in a ZIP gives you the spreadsheet plus a folder with one PNG per size, named by GTIN, or by SKU when there is no GTIN.
Save a template
To reuse a set of columns, click Save as template and give it a name. Templates are shared with everyone in your company and appear under Start from.- Only the person who created a template can rename it.
- The creator or an admin can delete it. Exports already made with it are kept.